
How to set up WooCommerce on WordPress – a beginner’s guide
You’ve decided to sell online using WooCommerce. Good choice. Now let’s get it set up properly.
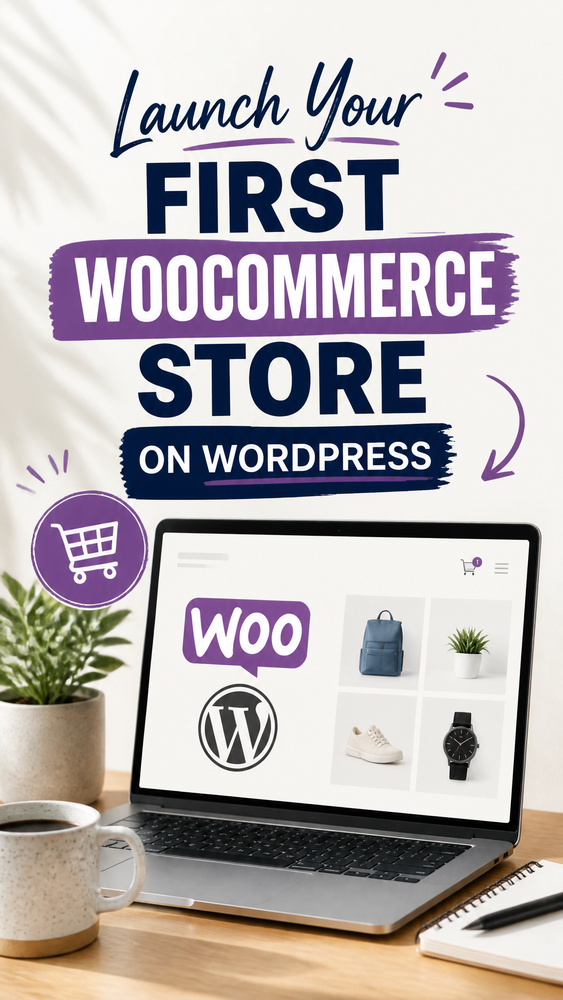
This guide walks you through how to set up WooCommerce on WordPress – the entire process, from installing WooCommerce on your WordPress site to having a live, functional shop with products listed, payments configured, and shipping ready to go. By the end, you’ll have a working WooCommerce store you can start selling from, with US and UK setup and pricing shown side by side throughout.
No technical knowledge required. Every step is covered.
Before you start – what you’ll need
A self-hosted WordPress site. WooCommerce is a WordPress plugin – it only works on self-hosted WordPress.org installations, not on WordPress.com free or lower-tier plans. If you haven’t set up WordPress yet, start here first.
Read: How to start a WordPress website for beginners →
Quality hosting. WooCommerce is more resource-intensive than a standard WordPress blog. SiteGround GrowBig is the recommended hosting for a WooCommerce store – the staging environment is invaluable for testing before pushing changes to a live store.
A payment processor account. Stripe is the recommended payment processor for most US and UK sellers – easy to set up, no monthly fees, and straightforward bank account payouts. Create a free Stripe account at stripe.com before you start.
Your product information ready. Before adding products, have your product names, descriptions, prices, and images ready. Having these prepared speeds up the setup significantly.
About 2–3 hours. A basic WooCommerce store with a handful of products, payments, and shipping configured is achievable in an afternoon.

Step 1 – Install WooCommerce
WooCommerce is a free plugin in the WordPress plugin directory.
In your WordPress dashboard, go to Plugins → Add New. Search for “WooCommerce”. When it appears in the results, click Install Now, then Activate.
After activation, WooCommerce launches its setup wizard automatically. This wizard guides you through the essential configuration – don’t skip it.

Step 2 – Run the WooCommerce setup wizard
The setup wizard covers the core configuration in a logical sequence. Work through each screen carefully.
Store details
Enter your store’s location – country, address, and postcode or zip code. This is used for tax calculations and shipping zone defaults.
Choose your industry – retail, food and drink, fashion, health and beauty, and so on. WooCommerce uses this to suggest relevant extensions.
Choose your product types – physical products, digital downloads, subscriptions, and bookings. Tick all that apply to your store.
Business details
WooCommerce asks about your current situation – whether you’re already selling elsewhere and your expected revenue. Answer honestly – the information is used to tailor recommendations, not shared publicly.
Tick whether you’d like WooCommerce to install recommended free features. Review the list carefully before accepting – some recommendations are useful, others add plugins you don’t need. Uncheck anything that isn’t relevant to your store.
Choose a theme
WooCommerce suggests compatible themes. If you’re already using Kadence, Astra, or another WooCommerce-compatible theme, select “Keep my active theme” and skip this step. If you’re starting fresh, Storefront (WooCommerce’s own free theme) is a clean, reliable starting point.
Complete the wizard
Once you’ve worked through all the screens, click “Finish setup.” WooCommerce creates the essential pages automatically – Shop, Cart, Checkout, and My Account – and adds them to your site.

Step 3 – Configure WooCommerce settings
The setup wizard covers the basics. Several settings are worth reviewing and configuring before adding products.
Go to WooCommerce → Settings in your WordPress dashboard.
General settings
Store address – confirm your store address is correct. Used for tax calculations and shown on invoices.
Selling locations – which countries you’ll sell to. “Sell to all countries” is the default. If you’re only selling domestically initially, restrict this to avoid shipping and tax complications from international orders you’re not ready to handle.
Default customer location – set to “Geolocate” for the most accurate tax and shipping defaults for each visitor.
Enable taxes – tick this if you need to charge tax. UK sellers not yet VAT-registered (threshold currently £85,000 in turnover) can leave this unticked for now and revisit it when they register. US sellers should enable this once they have nexus in a state that requires sales tax collection – see Step 3’s tax settings below for the detail.
Currency – set to US Dollar ($) for a US store or British Pound (£) for a UK store.
Products settings
Measurements – set to lb and in for US stores, or kg and cm for UK stores.
Reviews – decide whether to allow product reviews. Enable them – reviews significantly improve conversion rates once you have some. Enable “verified owner” reviews only to ensure reviewers have actually purchased.
Shop page – confirm that the WooCommerce-created shop page is correctly assigned.
Tax settings
If you’ve enabled taxes, go to the Tax tab. Tax setup differs meaningfully between the US and UK, so work through the section that applies to your market.
For UK stores:
Prices entered with tax – for most UK stores selling to consumers, entering prices inclusive of VAT is the standard approach. For B2B stores where customers are VAT registered, exclusive pricing may be more appropriate.
For a new UK store below the VAT threshold, you don’t need to configure tax rates yet. Revisit this when you become VAT registered.
For a VAT-registered UK store, the standard UK VAT rate is 20%. Add a tax rate under WooCommerce → Settings → Tax → Standard Rates:
- Country code: GB
- State: leave blank
- Rate %: 20
- Tax name: VAT
- Shipping: tick (VAT applies to shipping)
- Standard: tick
For US stores:
US sales tax is set at the state level rather than nationally, and there’s no single flat rate to enter as there is with UK VAT. Whether you need to collect it depends on where you have “nexus” – generally your home state, plus any state where your sales exceed that state’s economic threshold.
Manually adding a tax rate row for every US state and local jurisdiction under Standard Rates is impractical – rates vary by city and county as well as state. Instead, most US WooCommerce stores use a dedicated tax extension such as WooCommerce Tax (free, powered by Jetpack) or Avalara AvaTax, which calculates the correct rate automatically at checkout based on the customer’s address and your registered nexus states. Install and connect one of these before enabling tax collection for a US store.
For selling internationally beyond your home market, tax gets more complex quickly – EU VAT rules, other countries’ sales tax regimes, and customs duties all have different requirements. It’s worth consulting an accountant for the specific markets you’re targeting.

Step 4 – Set up payments
Go to WooCommerce → Settings → Payments.
This is where you configure how customers pay. For most US and UK stores, the essential setup is Stripe and PayPal.
Setting up Stripe (WooCommerce Payments or Stripe plugin)
Option A – WooCommerce Payments (Stripe-powered):
WooCommerce Payments is WooCommerce’s own payment solution, powered by Stripe. It integrates directly into the WooCommerce dashboard, showing payments and payouts without leaving WordPress.
In the Payments tab, find WooCommerce Payments and click Set up. Follow the prompts to connect your account. You’ll need to verify your identity with Stripe’s standard KYC process.
Option B – Stripe plugin:
If you prefer the standalone Stripe plugin, search for “Stripe Payment Gateway” in Plugins → Add New. The WooCommerce Stripe plugin connects your existing Stripe account directly.
Both options use Stripe’s infrastructure. WooCommerce Payments integrates more deeply into the WooCommerce dashboard. The standalone Stripe plugin gives you more direct control over your Stripe account settings. Stripe’s standard processing rate is 2.9% + 30¢ per transaction for US cards, and around 1.4–2.9% + a fixed fee for UK and EU cards.
Enable test mode first: Before processing real payments, enable test mode in your payment settings and run a complete test purchase using Stripe’s test card numbers (available in Stripe’s documentation). Confirm the order appears in WooCommerce, the email confirmation sends, and the payment appears in your Stripe dashboard – all in test mode.
Disable test mode before opening your store to real customers.
Setting up PayPal
In the Payments tab, find PayPal Standard or PayPal Checkout and click Set up. Enter your PayPal business email address.
PayPal redirects customers away from your site to complete payment, then redirects them back – a slightly less seamless checkout experience than Stripe. Enable it as a secondary payment option for customers who prefer PayPal.

Step 5 – Configure shipping
Go to WooCommerce → Settings → Shipping.
Shipping configuration is one of the areas where new WooCommerce store owners most commonly make mistakes – setting incorrect rates or forgetting to configure zones, then discovering the problem when a customer complains about unexpected shipping charges.
Create shipping zones
Shipping zones are geographic areas with their own shipping rates. For a store starting out, create two zones:
Zone 1 – your home country
Click Add zone. Name it after your home market, e.g. “United States” or “United Kingdom.” Under Zone regions, select your country.
Add shipping methods to this zone – at a minimum, one of the following:
Flat rate – a fixed shipping cost regardless of order size or weight. Simple and clear for customers. Click Add shipping method → Flat rate → Add. Set your flat-rate cost under the rate settings.
Free shipping – free above a minimum order amount. “Free shipping on orders over $50/£40” is a common threshold that incentivises larger baskets. Set the minimum order amount in the free shipping settings.
Local pickup – if you have a physical location, customers can collect from. No shipping cost.
Most new stores start with a flat rate and a free shipping threshold. Something like:
- Flat rate: $5 (USA) or £3.99 (UK)
- Free shipping: orders over $50 (USA) or £40 (UK)
This is simple for customers to understand and covers your basic shipping costs.
Zone 2 – International (optional)
If you’re shipping internationally from day one, create a second zone for “Rest of World” with separate international rates.
If you’re not shipping internationally initially, leave this zone out. When someone from outside your defined zones tries to check out, WooCommerce will show “No shipping options available”, – which is the correct behaviour if you don’t ship there.
Product weights and dimensions
For weight-based or carrier-calculated shipping to work accurately, products need their weight entered in the product settings. Add weights to your products after you’ve created them – even rough estimates are better than nothing for shipping calculation purposes.

Step 6 – Add your products
Go to Products → Add New.
Product title and description
Title – clear, specific, searchable. Include the key descriptors a customer would search for. “Handmade Lavender Soy Candle – 200g” is better than “Candle.”
Description – the full product description shown on the product page. Cover what the product is, what makes it special, key specifications (size, weight, materials), and who it’s for.
Short description – displayed next to the product image in the WooCommerce layout. A brief 1–3 sentence summary of the product’s key selling point.
Product images
Featured image – the main product image. Click “Set product image” in the right sidebar. Upload a clean, well-lit image of your product. Square images at a minimum of 800×800 pixels are recommended.
Product gallery – additional images showing different angles, context shots, or lifestyle imagery. Add these via the Product gallery section below the main product image.
Alt text – add descriptive alt text to every product image. Helps with accessibility and SEO.
Product data
The Product data box below the description handles pricing, inventory, shipping, and more.
General tab:
- Regular price – your standard selling price
- Sale price – optional, shown as a crossed-out price when set
Inventory tab:
- SKU – optional internal product code
- Manage stock – tick to track inventory levels
- Stock quantity – enter your current stock
- Allow backorders – whether customers can order when out of stock
Shipping tab:
- Weight – product weight in lb (US) or kg (UK). Important for shipping calculations.
- Dimensions – length, width, height in in (US) or cm (UK).
Linked products tab:
- Upsells – more expensive alternatives shown on the product page
- Cross-sells – complementary products shown in the cart
Product categories and tags
Assign each product to a relevant category. Create your categories before adding products – going to Products → Categories and setting up your category structure first makes the product addition process faster.
Tags are more granular than categories – add relevant descriptive tags to each product.
SEO for product pages
Scroll to the Rank Math SEO section at the bottom of the product editor. For each product:
- Set a focus keyword (what someone would search to find this product)
- Write a custom SEO title (under 60 characters)
- Write a meta description (under 155 characters, compelling enough to earn a click from search results)
Save and publish
Click Publish when the product is complete. Visit the product page on your live site and confirm it looks correct.
Repeat for each of your products.

Step 7 – Create and configure essential pages
WooCommerce automatically creates the Shop, Cart, Checkout, and My Account pages. Review and customise each one.
Shop page
The shop page is the main product listing page – it displays all your products. Visit it on your live site and confirm your products are showing correctly. Adjust the number of products per page under WooCommerce → Settings → Products → Display.
Checkout page
Visit the checkout page on your live site. Check that:
- The fields are appropriate for your store
- Payment options are showing correctly
- The layout looks professional on mobile
Checkout customisation: The free Checkout Field Editor plugin lets you add, remove, or reorder fields in the checkout process if the defaults don’t match your needs.
My Account page
This is where customers manage their orders, addresses, and account details. Confirm it works correctly by creating a test customer account.
Privacy policy and terms
Your checkout page should link to your privacy policy and terms. In WooCommerce → Settings → Advanced, set the Privacy policy and Terms and conditions page links to your existing policy pages.

Step 8 – Set up order emails
WooCommerce sends automated emails for order events – new order, order processing, order complete, and so on. These are functional by default but worth customising.
Go to WooCommerce → Settings → Emails.
For each email type, click Manage to customise:
- Subject line
- Email heading
- Additional content (footer text)
At a minimum, customise the New Order email (the one you receive when a customer orders) to confirm it’s going to the correct email address. Customise the Order Processing and Order Complete emails (what your customer receives) to match your brand voice.
The email design is controlled by the WooCommerce email template. For a more polished email design, the free Email Customizer for WooCommerce plugin is worth installing – it provides a visual editor for your WooCommerce emails.

Step 9 – Set up WooCommerce analytics
WooCommerce includes built-in analytics under WooCommerce → Analytics.
The analytics dashboard shows:
- Revenue over time
- Orders volume
- Best-selling products
- Customer acquisition data
- Stock status
Review these reports regularly – they tell you which products are performing, where your customers are coming from, and how your store is trending over time.
Connect Google Analytics:
In addition to WooCommerce’s built-in analytics, connecting Google Analytics gives you more detailed visitor behaviour data. Install the free Google Site Kit plugin and connect your Google Analytics 4 property – it tracks WooCommerce purchases and revenue alongside standard website metrics.

Step 10 – Test everything before going live
Before opening your store to real customers, test the complete purchase flow.
Run a test order:
Enable test mode in your Stripe settings. Go to your shop as a regular visitor – in an incognito browser window so you’re not logged in as admin.
Find a product, add it to the cart, proceed to checkout, fill in the details, and complete the purchase using Stripe’s test card number (4242 4242 4242 4242, any future expiry, any CVV).
Confirm:
- ☐ The product was added to the cart correctly
- ☐ Shipping rates calculated correctly
- ☐ Payment processed (in test mode) without errors
- ☐ Order appeared in WooCommerce → Orders
- ☐ Order confirmation email arrived at the customer’s email address
- ☐ New order notification arrived at your admin email
- ☐ The process worked correctly on mobile
Fix any issues before disabling test mode and opening to real customers.
Disable test mode in your Stripe settings before you announce your store.

Essential WooCommerce plugins to install
Beyond the core WooCommerce setup, these additional plugins are worth installing for most stores.
WooCommerce Stripe Payment Gateway (free) – if you’re using the standalone Stripe plugin rather than WooCommerce Payments.
WooCommerce Tax (free, US stores) – automatic US sales tax calculation by state and local jurisdiction, powered by Jetpack.
UpdraftPlus (free) – automated daily backups. Essential for any store. Set up before you start taking real orders.
Rank Math (free) – SEO for all your product and category pages.
WooCommerce PDF Invoices & Packing Slips (free) – automatically generates PDF invoices attached to order emails. Professional and legally useful.
YITH WooCommerce Wishlist (free) – lets customers save products to a wishlist. Improves customer experience and provides data on popular products.
MonsterInsights or Google Site Kit (free) – Google Analytics integration with ecommerce tracking.
Judge.me Product Reviews (free tier) – customer reviews on product pages. Reviews significantly improve conversion rates once you have them.
Going live
Once you’ve tested everything and you’re satisfied the store works correctly:
- Disable Stripe test mode
- Confirm PayPal is connected to your live business account
- Check your shipping rates are correct for your actual products and carriers
- Confirm your email notifications are going to the right addresses
- Check that your store looks correct on mobile
- Tell people about it
Read our website launch checklist for a complete pre-launch review →

Common WooCommerce problems and fixes
“No shipping options available” at checkout
The most common cause is that you haven’t created a shipping zone that covers the customer’s location, or your shipping zone has no shipping methods added. Go to WooCommerce → Settings → Shipping and check your zones and methods are configured correctly.
The payment gateway is not showing at checkout
Check that the payment gateway is enabled (toggle in WooCommerce → Settings → Payments). Check you’re not in test mode if you’re testing with real cards, or that you are in test mode if you’re using test card numbers.
Order emails are not arriving
WordPress email deliverability is a common issue. Install WP Mail SMTP and configure it to send through Gmail or another reliable SMTP service. This resolves most WordPress email delivery problems.
Products not showing on the shop page
Check that the product is published (not in draft). Check it’s not set to “Hidden” visibility in the product settings. Check that the shop page is correctly assigned in WooCommerce → Settings → Advanced.
The checkout page is not working correctly
Checkout page conflicts are often caused by plugin or theme CSS conflicts. Try switching to the Storefront theme temporarily to see if it resolves the issue. If the checkout works on Storefront, the conflict is theme-related.

Frequently asked questions
How do I set up WooCommerce on WordPress?
Install the free WooCommerce plugin from your WordPress dashboard, run its setup wizard to configure your store details, add your products, then set up payments (typically Stripe and PayPal) and shipping zones before testing a complete order and going live. See the full step-by-step breakdown above for each stage.
Is WooCommerce free to set up?
The WooCommerce plugin is free. You pay for hosting (from ~$4.99/month in the USA or ~£3.50/month in the UK), a domain (~$12–$15/year or ~£10–£15/year), and any premium extensions you need. A basic WooCommerce store can be live for under $75 (USA) or £60 (UK) in year one. Read our WooCommerce review →
Do I need coding knowledge to set up WooCommerce?
No – the setup wizard and product editor are all visual interfaces. Basic WordPress familiarity is helpful, but no coding is required to get a functional store live.
How many products can WooCommerce handle?
WooCommerce can handle thousands of products. The practical limit is determined by your hosting quality rather than WooCommerce itself. Budget shared hosting struggles with very large catalogues – quality hosting (SiteGround, WP Engine, Kinsta) scales to any reasonable product count.
Can I use WooCommerce without a theme?
No – WooCommerce requires a WordPress theme to display your store. The free Storefront theme is designed specifically for WooCommerce and requires no additional configuration. Kadence and Astra are strong free alternatives that also integrate well.
How do I accept payments without a Stripe account?
PayPal is the main alternative – PayPal Standard is included with WooCommerce and doesn’t require a Stripe account. PayPal redirects customers away from your site to pay and back again – a slightly less seamless experience, but widely trusted.
What’s the difference between WooCommerce and Shopify?
Shopify is a hosted all-in-one ecommerce platform – easier to set up, but with monthly platform fees and no content publishing capability. WooCommerce is a free WordPress plugin — more setup required, but no platform fees, complete ownership, and full WordPress content capability alongside your shop. Read our full comparison →
Howtostartyourwebsite.com may get paid commission for purchases made after clicking a link on this page. This website is for inspiration purposes only. The content provided is meant to spark creativity and ideas, not to serve as professional advice or as endorsement.